My Process of Illustrating a Character Portrait

Blog Post: Creating a Character Portrait - My Design Process.

I thought it would be fun to show you my process for how I created my most recent character portrait illustration. I decided to take on a new-to-me Skillshare course by the wonderful Charly Clements called Fun With Faces: Create a Stylised Digital Portrait. This is the project that was born from watching the course!

Moodboard & Rough Sketch

I started knowing that I wanted a warm aesthetic with joyfully bright colours and I wanted to make sure to include an orange (fruit) pattern somewhere within the design. After browsing Pinterest for a while I came away with a better idea for what I wanted to do. I created a quick moodboard with the ideas I'd gathered from Pinterest.

tawnart.com_blog_clementine-moodboard

Initial Sketch

Once I had the moodboard and general colour palette I wanted to go with, I went to work sketching the design of my character. I played around with size, and shape, making sure to add fun little details here and there within the design. Like those funky earrings and those super puffy sleeves!

tawnart.com_blog_clementine-sketch

Flat Colours

After I was happy with the general design I played with the colour palette. Because I started this illustration with a pretty good idea of what I wanted the end result to look like, it wasn't too much of a struggle to settle on a colour scheme that I really loved!

I then laid out the flat colours of each part of the design so that I would be ready to add shading, texture and fun little details to the final illustration.

tawnart.com_blog_clementine-flats
tawnart-portfolio-newsletter-icon

Calling all art lovers ✨

Want the inside scoop on new product launches, snag free monthly wallpapers, and get exclusive peeks behind the creative curtain? Jump on my monthly email train and never miss a beat in this vibrant corner of the world!

Sign up now!

Final Character Portrait

Now that all the shapes within the design were coloured in, I was ready for the fun part! I love adding shading, texture and little details to all my illustration work and this was no different! I took the time to really have fun with trying out different texture brushes and see what I could put together.

Final thoughts

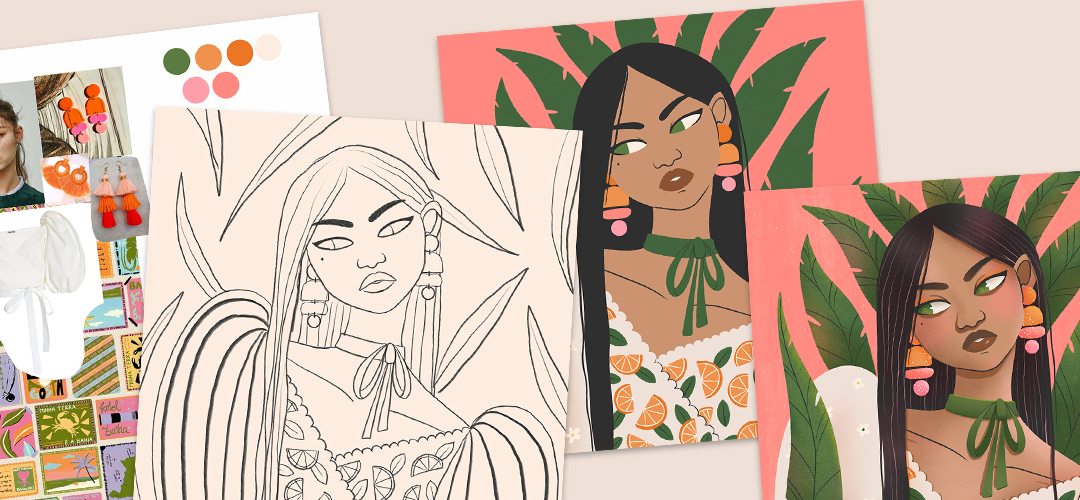
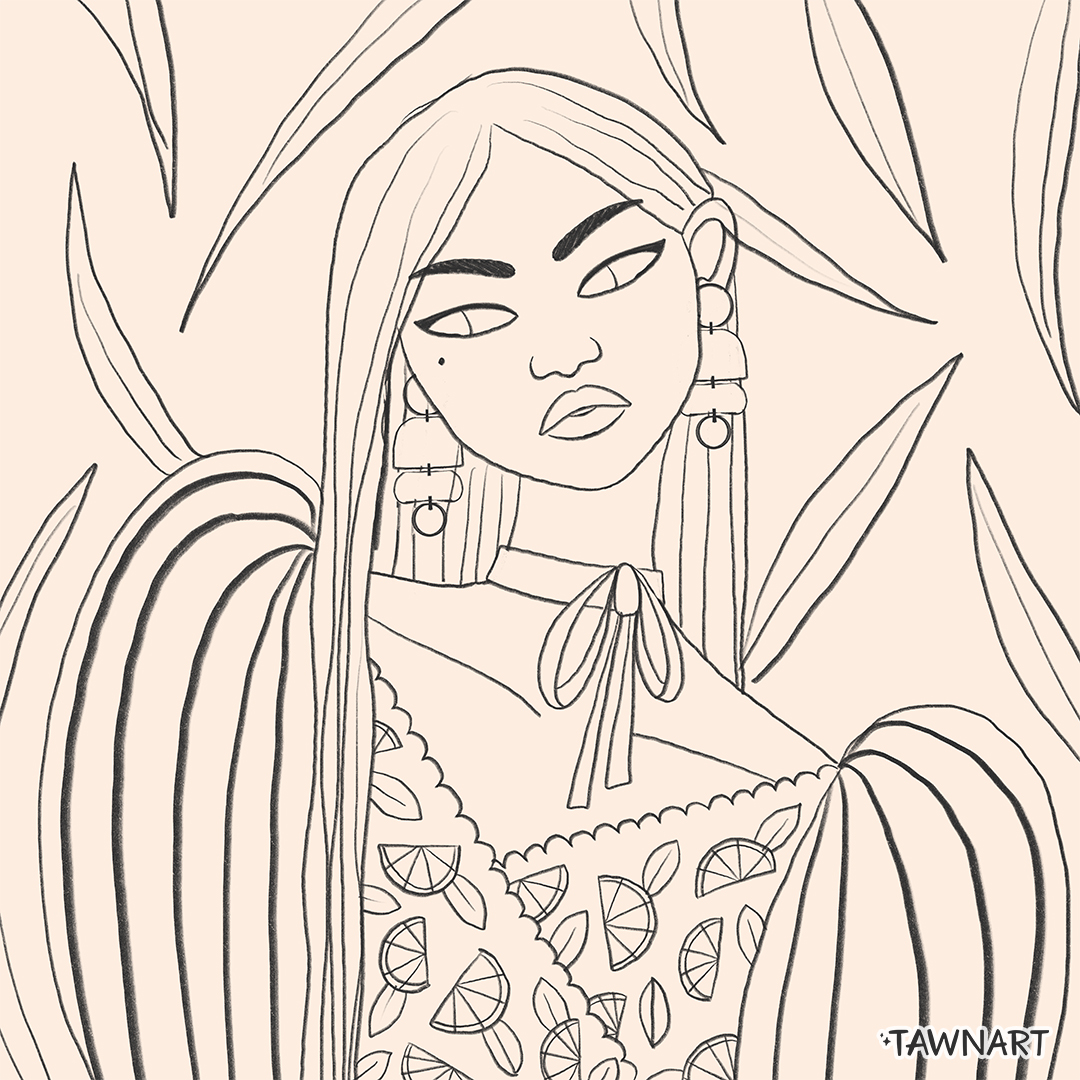
I'm super pleased with how it came together while having a blast working on it! And based on the feedback I've gotten on social media, it seems I'm not the only one that likes it! In total, it took me around 5 hours from start to finish. Which is pretty decent for me. I played around with a bunch of fun brushes and textures, and really took my time enjoying the whole process!

The class was a really great reminder that drawing different types of shapes to add character to my characters makes for a more interesting design overall. If you haven't taken this course yet and you have a Skillshare membership, I definitely recommend that you check out the course if character drawing is something that interests you.

And if you don't have a Skillshare membership, no problem, you can sign up for a 14-day trial using my affiliate link below.

Disclaimer: I'm a Skillshare affiliate. I'm sharing it with you because the courses have been beneficial to me and I think you might also benefit from it. By using my affiliate link, I may earn a discount, but at no additional cost to you.

tawnart-tawn-signature

Let's be friends on social

If you have any questions or just want to say hi, get in touch.


Pin this for later!

tawnart.com_pinterestcover_clementine

Comments are closed.